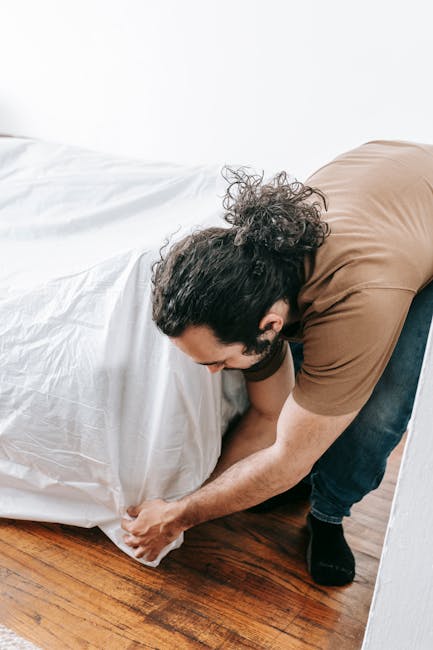
Pro Techniques for Heavy Lifting and Low-Damage Removal
If you have ever tried to move a bulky wardrobe down a narrow stairwell, you already know the problem: the item is heavy, the space is tight, and one wrong turn can leave a scuffed wall, a cracked tile, or a very quiet moment of regret. Pro Techniques for Heavy Lifting and Low-Damage Removal are all about getting large, awkward, or fragile items out safely, without turning the job into a repair project afterwards.
This guide explains how the process works, what experienced removal teams do differently, and how to reduce risk whether you are clearing a house, moving furniture, or dealing with a mixed load of items that seem to have been designed to catch on every doorway in the building. Truth be told, the best removal work often looks uneventful. No drama. No dings. No frantic patching up at the end.
Below, you will find practical steps, common mistakes, a comparison of methods, and a realistic checklist you can use before anything gets lifted. If you need broader clearance support as part of a bigger job, services like home clearance, furniture clearance, or house clearance may also be relevant depending on the item and setting.
Table of Contents
- Why pro techniques matter
- How the process works
- Key benefits and practical advantages
- Who this is for and when it makes sense
- Step-by-step guidance
- Expert tips for better results
- Common mistakes to avoid
- Tools, resources and recommendations
- Law, compliance, standards, and best practice
- Options, methods, and comparison table
- Case study or real-world example
- Practical checklist
- Conclusion
- Frequently asked questions
Why Pro Techniques for Heavy Lifting and Low-Damage Removal Matters
Heavy lifting is never just about strength. That is the first thing people underestimate. It is about balance, route planning, pressure points, surface protection, communication, and knowing when a sofa should be tilted, turned, or simply dismantled. Without that know-how, even a routine move can damage walls, floors, banisters, door frames, or the item itself.
Low-damage removal matters for three very simple reasons. First, it saves money on repairs. Second, it protects the property, which is especially important in rented homes, shared flats, offices, and managed buildings. Third, it reduces stress. Nobody enjoys trying to explain a chipped stair nosing or a cracked splashback after an otherwise straightforward clear-out.
In real life, the problem often appears in small, awkward ways. A heavy chest of drawers might fit through the room, but not round the landing. A washing machine may clear the doorway by a whisker and then catch on a pipe. A headboard may look harmless until you try to rotate it in a hallway that has all the width of a suitcase. The technique is what changes the outcome.
For larger clearances involving mixed waste, awkward furniture, or site debris, removal needs a practical plan rather than guesswork. That is why many people pair lifting work with structured services such as waste removal or, where relevant, builders waste clearance.
How Pro Techniques for Heavy Lifting and Low-Damage Removal Works
The basic method is simple to describe, though a bit more nuanced to do well. A professional removal process usually starts with assessment, then route planning, then protection, then lifting, and finally safe exit and loading. Each stage matters. Skip one, and the whole job gets wobblier.
1. Assessment before movement
Before anything is lifted, the team checks the item's size, weight, shape, balance, and fragility. They also look at the route: staircases, landings, doors, floors, garden paths, lifts, parking access, and anything else that can complicate the move. In a flat, that might mean a narrow communal corridor. In a house, it may be a low ceiling on the stairs or a sharp turn at the bottom. Little things. Big difference.
2. Protection of the property
Experienced teams use floor runners, corner protectors, blankets, and straps where needed. The idea is not to wrap every room like a museum exhibit, but to protect the points where contact is most likely. Door frames, painted corners, bannisters, and polished floors are the usual culprits.
3. Controlled lifting and manoeuvring
Good lifting is coordinated. One person leads, another follows, and both use clear calls. The object is kept close to the body when possible, then adjusted with small movements rather than sudden swings. It sounds basic, yet this is where many accidents are prevented. A jerky lift on a wet day, with someone muttering "it'll be fine," is usually the start of a problem. Let's face it.
4. Dismantling when it reduces risk
Some items are safer to move in parts. Beds, wardrobes, desks, shelving units, and certain white goods may be easier to remove after partial dismantling. A quick five-minute strip-down can save twenty minutes of awkward wrestling and a lot of scuffed paint.
5. Loading with weight distribution in mind
Once outside, the item should be loaded so weight is balanced and access inside the vehicle stays manageable. Heavy items are secured to avoid shifting. This protects the load, the crew, and the property during the final carry-out. If the job includes reusable items, then care becomes even more important because damage can reduce their reuse value straight away.
Key Benefits and Practical Advantages
The obvious benefit is fewer damages, but the full picture is wider than that. A proper low-damage removal method improves time, safety, and efficiency all at once. That is what makes it worth doing properly rather than rushing.
- Reduced repair costs: fewer dents, scratches, cracked corners, and floor marks.
- Better safety: less chance of dropped items, trapped fingers, or slips on stairs.
- Faster turnaround: the right method often saves time because it avoids resets and delays.
- Cleaner finish: the property is left in a better state, which matters for end-of-tenancy work, sales prep, or office handovers.
- More efficient sorting: reusable, recyclable, and disposable materials can be separated more cleanly.
- Less stress for everyone: the job feels managed instead of chaotic.
There is also a less visible benefit: confidence. When you know the route, the weight, and the handling plan, the work becomes calmer. No frantic shuffling. No guesswork. Just steady progress.
If the item is part of a wider clear-out, the journey often runs more smoothly when linked with furniture disposal or, for items stored out of sight, garage clearance and loft clearance.
Who This Is For and When It Makes Sense
These techniques matter for more people than you might expect. You do not need to be moving a grand piano to benefit from them. Even one awkward item can justify a careful plan.
- Homeowners clearing bulky furniture or inherited items
- Landlords and letting agents preparing a property for new occupants
- Tenants needing to remove items without damaging fixtures at move-out
- Office managers clearing desks, cabinets, and IT furniture
- Trades and contractors dealing with site debris or damaged materials
- Families handling clearance after a house move, refurb, or bereavement
- Businesses with restricted access, shared entrances, or time-sensitive removals
It makes sense when the item is bulky, heavy, fragile, valuable, or difficult to navigate through the building. It also makes sense when the environment itself is delicate: old plaster walls, timber floors, narrow stairwells, glass doors, or newly painted spaces. In those cases, the removal plan matters as much as the lifting plan.
For commercial premises, a careful approach is especially useful. A good example is an office with lift access at one end but tight fire doors at the other. That is the sort of space where simple strength is not the answer. Planning is.
Step-by-Step Guidance
Here is a practical sequence you can follow for heavy lifting and low-damage removal. It is not fancy. It works.
Step 1: Measure the item and the route
Measure width, height, depth, and any protruding parts such as handles, feet, arms, or castors. Then measure the route, including stair landings and tight turns. A tape measure is cheap. Replacing a broken bannister is not.
Step 2: Identify fragile points
Check whether the item has glass, loose fittings, sharp edges, delicate veneers, or unstable contents. Empty drawers, remove shelves, tape doors shut if needed, and secure any loose panels. Sounds dull, but it prevents the classic "why is the door hanging off?" moment.
Step 3: Clear the path
Remove trip hazards, move small items aside, and make sure the exit is usable. If the route includes communal areas, check whether you need to avoid busy times or protect shared surfaces more carefully.
Step 4: Protect surfaces before the move
Lay floor protection along the route and cover corners or bannisters where contact is likely. If the weather is damp, think about mud and wet shoes too. A clean route can become a slippery route very quickly in winter. Very quickly.
Step 5: Choose the right lift method
Use two-person lifting for awkward items, and more people where the object is long, heavy, or unstable. Keep the item close to the body, move slowly, and communicate before turning or lowering. If the item needs to be tilted, make sure everyone understands the sequence first.
Step 6: Dismantle where it helps
If the item will not clear the space safely, dismantle it. Take off legs, doors, shelves, or fittings where appropriate. Keep fixings in labelled bags. The tiny screws matter more than they look right now.
Step 7: Carry out and load with control
Move steadily, avoid twisting, and keep eyes on the route as well as the item. When loading, place the heaviest items first and secure them so they do not shift. If multiple items are being removed, group similar loads together to reduce extra handling.
Step 8: Check for damage and finish properly
Once the item is out, inspect the route for any marks, scuffs, or loose debris. A quick final check helps spot issues early, before they become awkward conversations later.
Expert Tips for Better Results
Some of the best advice is plain old practical judgement. That is usually how it goes in the real world.
- Move slowly on stairs, faster nowhere: speed creates mistakes more often than it saves time.
- Use a spotter in tight spaces: one person should focus on clearance, especially at door frames and corners.
- Protect the first impact points: the first corner, the lowest stair, and the narrowest turn are where damage tends to happen.
- Keep hands away from pinch points: especially with folding mechanisms, hinges, and heavy lids.
- Take the "can we split this?" approach early: dismantling at the start is usually smarter than forcing it halfway through.
- Plan where the item lands next: an item dropped "just for a second" often causes the next delay.
One small human tip: if the job is getting tense, stop for ten seconds and reset. People make more mistakes when they try to muscle through frustration. The item does not care how determined you feel.
For larger mixed jobs, many teams also coordinate item sorting, reuse decisions, and onward recycling. If sustainability matters to you, it is worth reviewing a provider's recycling and sustainability approach before the work begins.
Common Mistakes to Avoid
Most removal damage is not caused by one dramatic error. It is caused by five small ones that build up. Here are the big offenders.
- Skipping measurements: guessing the fit is how furniture gets wedged in a stairwell.
- Dragging instead of lifting: dragging may feel easier, but it often ruins floors and weakens the item.
- Ignoring weight distribution: one heavy side can make the whole item unstable.
- Forcing a turn: if a doorway is too tight, stop and rethink the route or dismantle the item.
- Not protecting corners and floors: damage often happens in the last metre, not the first.
- Leaving clutter in the route: loose shoes, mats, cables, and bins are classic trip hazards.
- Using too few people: saving one pair of hands can cost far more in damage or delay.
A slightly irritating truth: the mistake people remember most is usually the one they dismissed as "minor." The small things matter. They really do.
Tools, Resources and Recommendations
You do not need a van full of specialist kit for every removal job, but the right tools make a noticeable difference. A sensible setup usually includes the following:
- Furniture blankets and wraps for edges and vulnerable finishes
- Floor protection such as runners, boards, or protective sheeting
- Straps and lifting aids for balanced movement and secure handling
- Gloves for grip and hand protection
- Dollies or trolleys for appropriate flat-surface moves
- Basic dismantling tools for beds, cabinets, and modular pieces
- Labels or bags for fixings so nothing disappears into the void
For some jobs, the best resource is not a tool at all but a structured service. If the item list is broad, or if you are dealing with mixed household contents, flat clearance and office clearance can make more sense than trying to tackle everything piecemeal.
If you are comparing providers, practical questions are worth asking: How do they protect floors? Do they dismantle items when needed? How do they handle recyclable materials? What happens if access is awkward? The best answers are usually direct and sensible, not fancy. You can also review insurance and safety information and health and safety policy details where available, because trust is not something you want to guess at.
Law, Compliance, Standards, or Best Practice
Removal work can involve more than lifting. There may be obligations around safe working, waste handling, access, and disposal. In the UK, the practical rule of thumb is simple: do not create avoidable risk for people, property, or the environment.
For homes and businesses, best practice normally includes careful risk assessment, safe manual handling, sensible use of equipment, and proper segregation of reusable or waste materials. Where a job involves disposal, it is wise to ensure the provider understands responsible waste handling and works in line with accepted UK expectations. If a property is shared, rented, or managed, you may also need to respect building rules about access times, lift use, and communal protection.
When you are dealing with clearance after building work, it is especially helpful to keep materials separated where possible. That can make collection, recycling, and disposal smoother. If you need that sort of support, builders waste clearance is the type of service usually suited to the job.
One caution worth saying plainly: if an item is too heavy, too awkward, or too risky for the available space, do not force it. Best practice is to change the method, not the odds. That might mean dismantling, using more people, or calling in a team with the right experience.
Options, Methods, and Comparison Table
There is more than one way to get bulky items out of a property. Which method works best depends on the object, the access, and the finish you want to preserve.
| Method | Best for | Pros | Trade-offs |
|---|---|---|---|
| Manual two-person carry | Medium-heavy furniture, smaller appliances | Controlled, flexible, good for tight spaces | Needs coordination and adequate strength |
| Dismantle and remove in parts | Wardrobes, beds, shelving, desks | Reduces snagging and damage risk | Takes extra time and tools |
| Trolley or dolly move | Flat routes, garages, ground-floor spaces | Reduces physical strain | Not suitable for stairs or uneven ground |
| Full-service clearance | Mixed contents, time-sensitive removals, larger jobs | Less stress, more efficient, often safer | Less DIY control over the process |
In practice, the right answer is often a mix. A heavy cabinet may be dismantled, carried on blankets, and then loaded with straps. Not glamorous, but effective. And honestly, that is the point.
Case Study or Real-World Example
A typical example is a Victorian terrace with a long staircase, a tight landing, and a double wardrobe that looked manageable until it was turned sideways. The initial plan was to carry it out in one piece. After measuring the landing, though, it became clear that the wardrobe would catch on the banister and likely leave marks on the paintwork.
The better approach was to remove the doors, empty the shelves, dismantle the top frame, and protect the stair edges before moving anything. That turned a potentially messy job into a calm one. The team used two people for the main lift, one person at the landing to guide the turn, and blankets to protect the timber floor where the wardrobe needed to pivot. No scrape on the stairs. No rushed apologies. Just steady progress.
That sort of outcome is common when the job is planned properly. You notice the difference most at the moment something could have gone wrong and, for once, does not.
Practical Checklist
Use this checklist before any heavy lift or low-damage removal job. It is a simple safeguard, and it saves hassle.
- Measure the item and the route
- Check for tight corners, low ceilings, and narrow doorways
- Empty drawers, shelves, and loose contents
- Remove detachable parts where sensible
- Protect floors, walls, corners, and bannisters
- Assign roles before lifting starts
- Use gloves and suitable footwear
- Keep the route clear of clutter and trip hazards
- Lift in sync and communicate turns clearly
- Pause and reassess if the item catches or shifts
- Inspect the route after removal
- Sort reusable items, recyclable material, and waste appropriately
If you are working through a property room by room, it can help to think about clearance in stages rather than as one giant task. A staged approach often works better for garage clearance, loft clearance, and mixed domestic jobs. Less chaos. Fewer surprises.
Conclusion
Pro Techniques for Heavy Lifting and Low-Damage Removal are really about control: control of the route, the weight, the surfaces, the timing, and the final outcome. The strongest team is not always the one that lifts fastest. It is the one that finishes the job cleanly, safely, and without leaving little repair jobs behind.
Whether you are clearing one stubborn item or planning a larger move, the same principles apply. Measure first. Protect surfaces. Use the right people and the right method. And if the job is bigger than expected, that is not a failure. It is just a sign to slow down and handle it properly.
Get a free quote today and see how much you can save.
When a removal job is done well, the room feels lighter afterwards. Quiet. Orderly. A bit of breathing space, which is often exactly what people needed all along.
Frequently Asked Questions
What are pro techniques for heavy lifting and low-damage removal?
They are the methods professionals use to move bulky or awkward items safely while protecting floors, walls, door frames, and the item itself. That usually includes measuring the route, protecting surfaces, planning the lift, and dismantling items where needed.
Why is low-damage removal more difficult than just lifting something?
Because the challenge is not only the weight. You also have to manage tight spaces, fragile finishes, awkward angles, and potential slip or pinch points. One badly judged turn can cause more damage than the lift itself.
Do I always need to dismantle furniture before removal?
No, but dismantling is often the safer choice when an item is too wide, too tall, or too awkward for the route. It reduces snagging and makes turns easier, especially in stairwells and narrow hallways.
How do professionals protect floors and walls during removal?
They normally use floor runners, blankets, corner protection, and careful route control. The most vulnerable spots are usually corners, stair edges, bannisters, and any newly painted or polished surfaces.
What is the safest way to move a heavy item down stairs?
The safest method is usually a coordinated two-person or multi-person carry with clear communication and a slow pace. If the item is unstable or the stairwell is tight, dismantling or alternative handling may be better.
Can heavy lifting damage the item being moved?
Yes. Scratched finishes, broken handles, cracked panels, and loose joints are common when items are forced or dragged. Good technique protects both the property and the item.
Is this approach useful for office or commercial clearances?
Absolutely. Office spaces often have lifts, fire doors, desks, filing cabinets, and shared access areas that need extra care. Low-damage removal is especially helpful where downtime and property condition matter.
What should I ask a removal company before booking?
Ask how they handle stairs, whether they dismantle items, what protection they use for floors and walls, how they manage awkward access, and whether they have appropriate insurance and safety processes.
How do I know if a job is too risky to do myself?
If the item is very heavy, unusually shaped, valuable, or hard to move through the space without forcing it, that is a good sign to step back. If you are unsure, it is usually wiser to get help than to risk injury or damage.
What happens to items after low-damage removal?
That depends on the condition and the service used. Items may be reused, recycled, or disposed of responsibly. If sustainability matters to you, ask how materials are sorted and handled after collection.
Is there a difference between furniture disposal and furniture clearance?
Yes. Furniture disposal usually focuses on the end result of removing and discarding an item, while furniture clearance often refers to clearing multiple items from a property, sometimes with sorting for reuse or recycling as part of the process.
Can low-damage removal help in flats and small homes?
Very much so. Flats and compact homes often have narrow corridors, shared entrances, and limited turning space. Careful lifting and surface protection can prevent damage where space is tight and every inch matters.
What is the most common mistake people make?
Underestimating the route. People often focus on the item's weight and forget the door width, staircase angle, landing size, or low ceiling. That is usually where the trouble starts.
When should I ask for a full clearance instead of moving one item?
If the space is cluttered, the job includes multiple bulky pieces, or you are already sorting waste and reusable items, a fuller service can be more efficient. It often saves time and reduces repeat handling.
If you want to learn more about the people and approach behind the service, you can also review about us, or get in touch through contact us when you are ready to talk through a specific job. For anything involving pricing, pricing and quotes may help set expectations before the work begins.